Post user creation for a customer on portal. Gather the following credentials:
- Host URL: The server address where the SFTP service is hosted.
-
Username: The unique username assigned to the customer.
-
Password: The secure password generated for the user (or set manually, depending on your system).
-
SFTP Folder: The folder name “ORDERS“ assigned to the customer that will be used to upload files.
Note: Ensure that the password is shared securely and never sent in plain text over unsecured channels.
Accessing the SFTP Folder
Customers can use any standard SFTP client (such as FileZilla, WinSCP, or command-line tools) to connect to the SFTP server.
Example using FileZilla:
-
Open FileZilla.
-
Setup a new site manage with Host as Host URL, Port as 22, Username, and Password that was provided above.
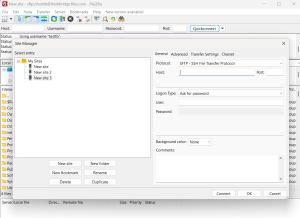 Source – FileZilla: Image 2.i
 - Make sure the protocol is chosen is SFTP – SSH File Transfer Protocol
- Click on “Connect“
- Post successful connection to the remote site, users will see below in the Remote site section for a basic configuration –
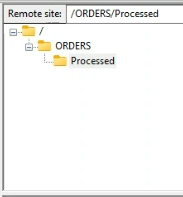
- Users will have read and write access to the ORDERS folder
- Now users can prepare the upload files following the unified template guidelines and upload or drag and drop the files into the ORDERS folder.
- A batch process will run every 15 minutes to handle the uploaded files. Once processed, these files will be moved to the ‘Processed’ folder. Users have read-only access to this folder, allowing them to download the files but not modify them.
- Note:
- Processing times may vary with file size and system traffic. Peak hours are Monday mornings and Friday evenings.
- Note:
- Access Permissions
- READ Access: Users have read access to all folders in the hierarchy.
- WRITE Access: Users have write access to the ORDERS folder.
-
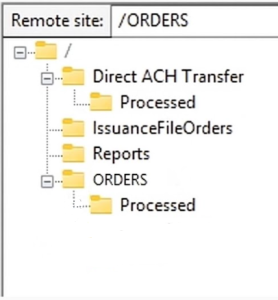
Additionally, based on the configuration, the SFTP includes the ‘Reports‘ folder, which has read-only access. Folder structure reference in case of configurations, attached here.